DIY Floating Shelves - How To Build Extra Bathroom Storage
Do yous love the gimmicky look and feel of floating shelves…but feel intimidated by tackling such a project yourself? I want to let you in on a fiddling surreptitious – building and mounting your own mesomorphic floating shelves is much easier than information technology might seem!
 View in gallery
 This tutorial volition have y'all through the procedure, footstep-by-step with photos, to show you how information technology tin can exist done in an hour or two. (Of course, the sanding and finish work will take longer and is upwards to you.)
 View in gallery
 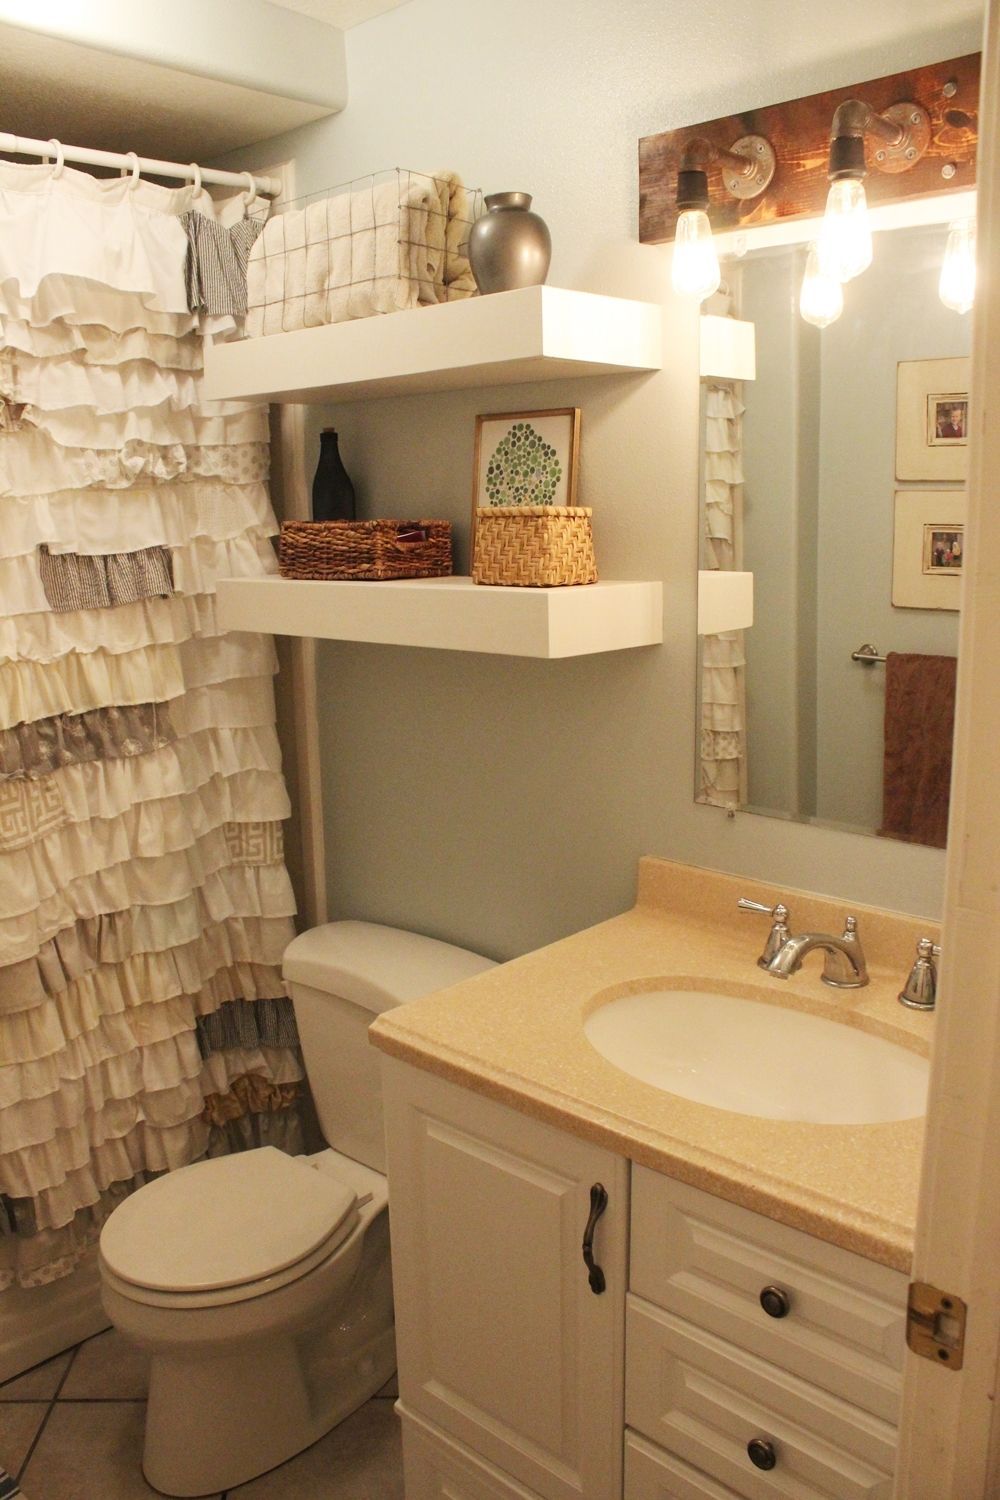 View in gallery
 Floating shelves work well in whatever space, frankly, merely they are particularly useful in the bath where horizontal surfaces and square footage both often autumn on the smaller cease of the spatial spectrum.
 View in gallery
 If you're prepare to switch up a useless wall (similar this sad wall in this sad, night bathroom) and make it into a showpiece, you must absolutely learn how to build floating shelves. They will alter your space 180 degrees.
 View in gallery
 Prepare to begin? I hope so! Let'south do this.
 View in gallery
 Materials you'll demand to build the bath floating shelves:
DIY Level: Intermediate
The listing below shows what you will demand to build two 28" floating shelves.
- Two (2) 1×10 boards cut 28" long
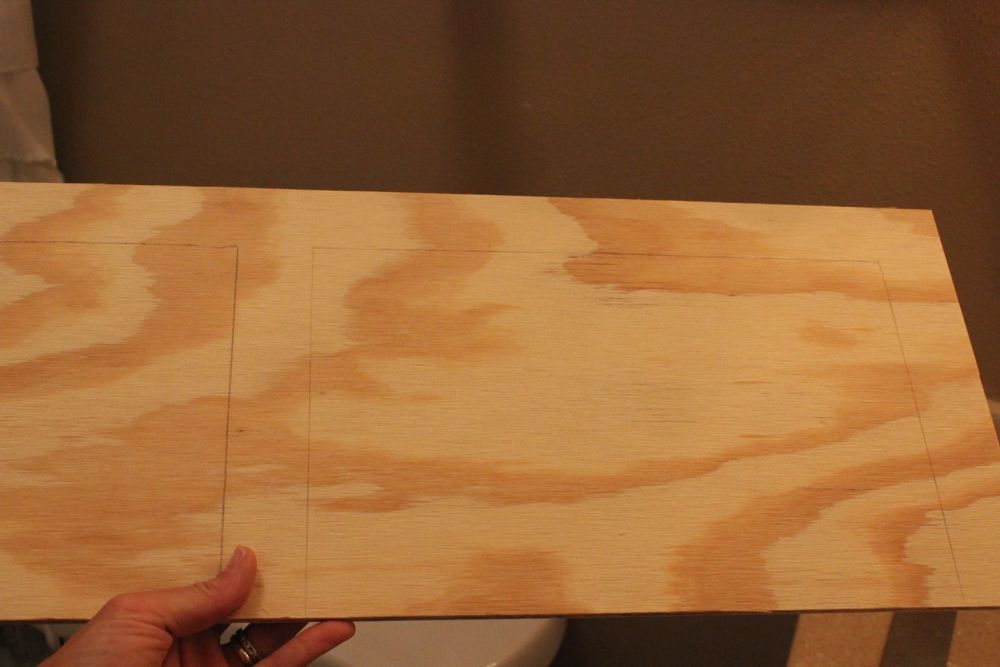
- Two (2) 1/4″ plywood boards cut to size (28"x9-one/4")
- Two (2) 2×iii boards cut 28" long
- Six (6) two×3 boards cut seven-3/iv" long
- 2 (ii) 1×4 boards cut 29-1/2" long
- Four (4) 1×4 boards cut ix-one/four" long
- Twelve (12) 2-ane/2" screws
- Eight (8) 3-one/two" screws
- Brad nails, wood glue, level
- Kreg jig, ability drill, brad nailer, clamps
- Whatever yous want for finishing (e.g., sandpaper, stain, paint, etc.)
How to build the bathroom floating shelves:
 View in gallery
 Step ane: Pocket holes
Begin by using your kreg jig to drill two pocket holes (for two-ane/2" screws) into 1 terminate of each of your six short (7-3/4") boards.
 View in gallery
 The 2 holes should exist nearly 1/ii" to 3/iv″ from the sides of your lath.
 View in gallery
 Step two: Clamp
Next step is to attach three of the short boards to the 28" long 2×3 board. Whenever I'g attaching i slice of wood to another using the pocket holes, I've found I get the best results when I clamp the pieces together then that edges and sides and ends align. In this instance, I clamped the long lath to my work table, and then clamped the short board in identify, with the clamp lining up over the joint between both boards.
 View in gallery
 Grab two-1/2" wood screws (or kreg or torx screws).
 View in gallery
 Step 3: Screw
Property the short board firmly into place with one hand (yes, even though it's clamped), screw in the ii-1/2" screws to attach the lath. Repeat for some other curt board on the other terminate of the long board, then 1 more in the middle.
 View in gallery
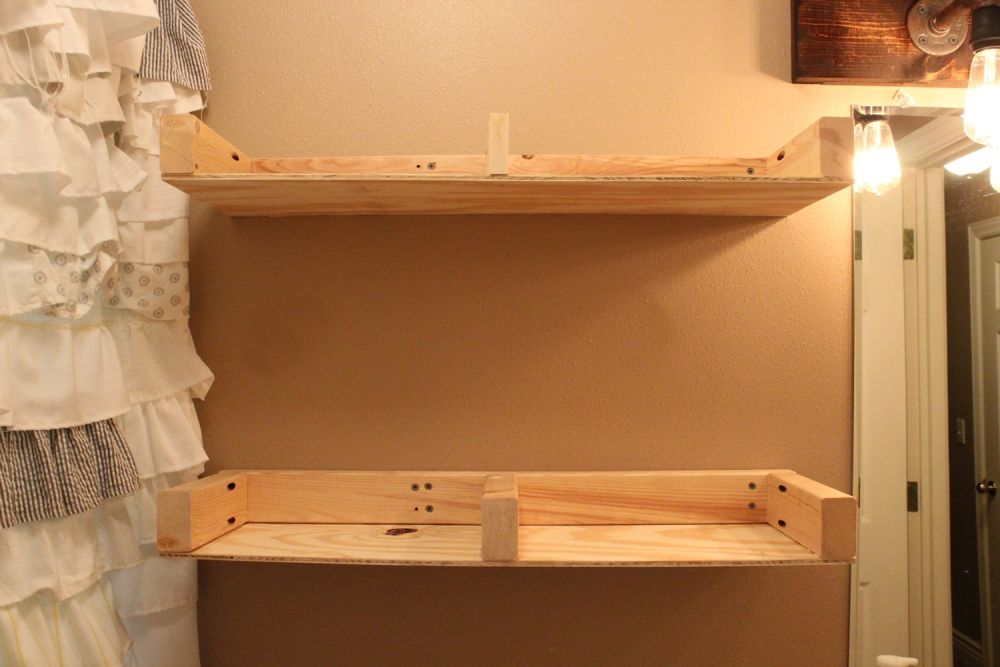
 Your 2×3 boards should expect similar this, and they now course the frame for one of your floating shelves. Repeat for the second floating shelf.
 View in gallery
 Step 4: Stud finder
Believe it or not, it's now time to adhere the floating shelves frames to your wall. Use a stud finder, if applicable, to discover where your wall studs are located.
 View in gallery
 Step 5: Mark the holes
Hold upward your shelf against the wall where you desire information technology to go, and then mark ii holes at the placement of each wall stud.
 View in gallery
 Predrill the holes at these places on your shelf frames.
 View in gallery
 For a 28" shelf (which ends upwardly being 29-1/2" really), you'll likely hit two wall studs. When these are well marked, it's time to mount the frame(due south) to the wall.
 View in gallery
 Grab your 3-ane/two" screws.
 View in gallery
 Step 6: Attach the shelf
Use one iii-1/two" spiral to attach the 2×3 board shelf frame to the wall. Only practise i screw at this point.
 View in gallery
 Step 7: Utilize a level
Utilise a level to make your shelf frame level. Lightly pound upward or downwards on the long lath (rather than the brusque boards) to adapt the frame to level.
 View in gallery
 When your frame is perfectly level, it'south time to screw in the rest of your screws.
 View in gallery
 Use one screw to the second set of predrilled holes first, then apply the other two screws until all 4 holes are filled and the frame is securely mounted to the wall.
 View in gallery
 Before yous mount your 2d shelf, you'll want to ensure vertical alignment. Use the level against one side of your get-go shelf, and mark with a pencil the place where the 2d shelf'due south side should go.
 View in gallery
 I will move this shelf to the right about one/4″, based upon my marker from the level.
 View in gallery
 Step eight: Second shelf
Mount the second shelf to the wall at the top/altitude that works for you lot and your space.
 View in gallery
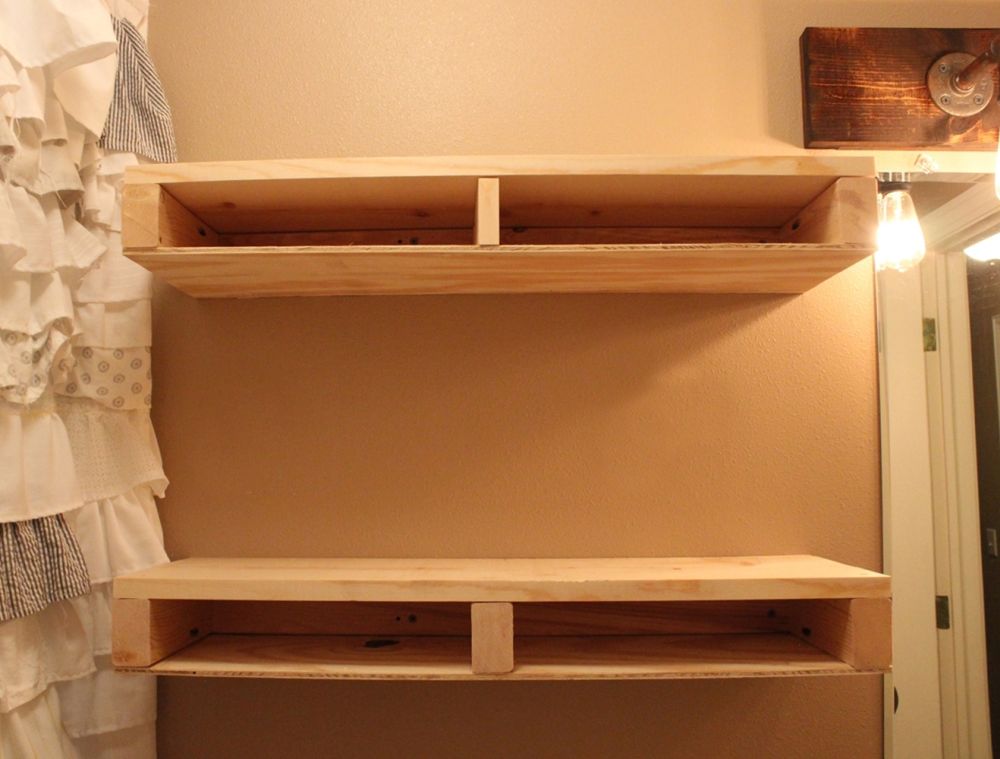
 Your frames volition wait something similar this.
 View in gallery
 Footstep 9: Bottom plywood
With the frames mounted to the walls, it'due south fourth dimension to install the lesser piece to both shelves. Take one of your ane/iv″ thick plywood pieces, cut to size, and hold it (rough side up) up to the bottom of your frame.
 View in gallery
 Utilise a pencil to marker the frame lines.
 View in gallery
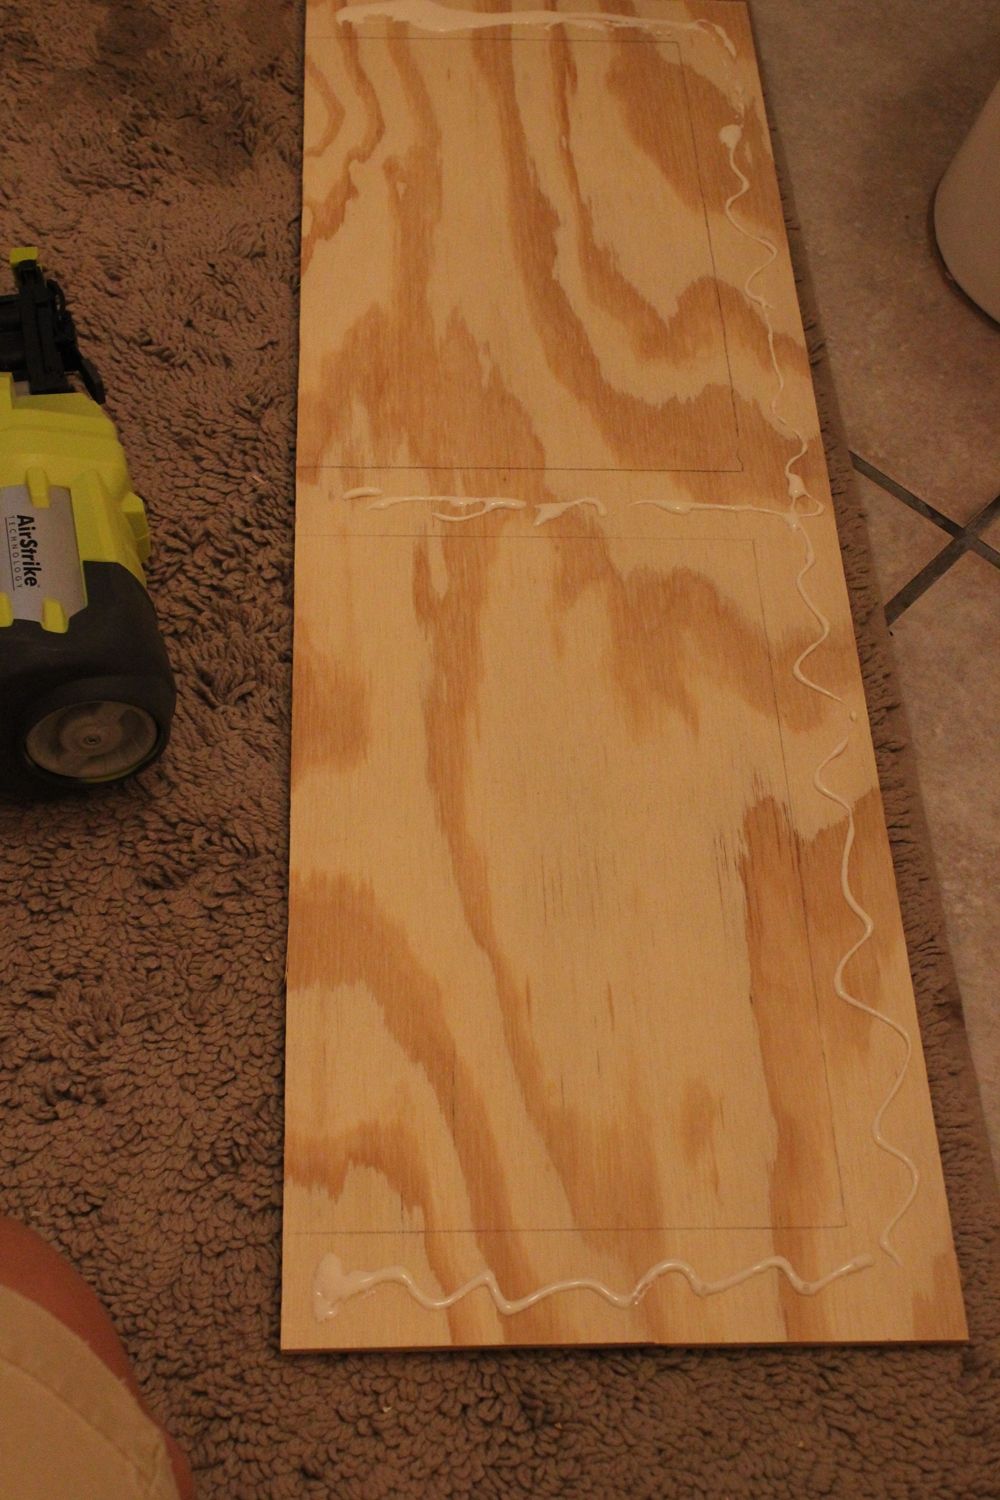
 Step 10: Forest mucilage
Grab some wood glue. You'll be applying a little bit of wood glue within the pencil lines on your plywood, and so you tin can adhere the bottom piece with both woods glue and brad nails.
 View in gallery
 Utilize the woods gum to your plywood, and stick it to the lesser of your floating shelf frame.
 View in gallery
 Footstep eleven: Secure the bottom
Apply a brad nailer to secure the glued lesser slice to the frame. Repeat for the other shelf.
 View in gallery
 (Note: Consider the size of your equipment when deciding which shelf to piece of work on first. It was easier to adhere the bottom slice to the superlative shelf and so move to the lesser shelf in this case, due to the size of my brad nailer.)
 View in gallery
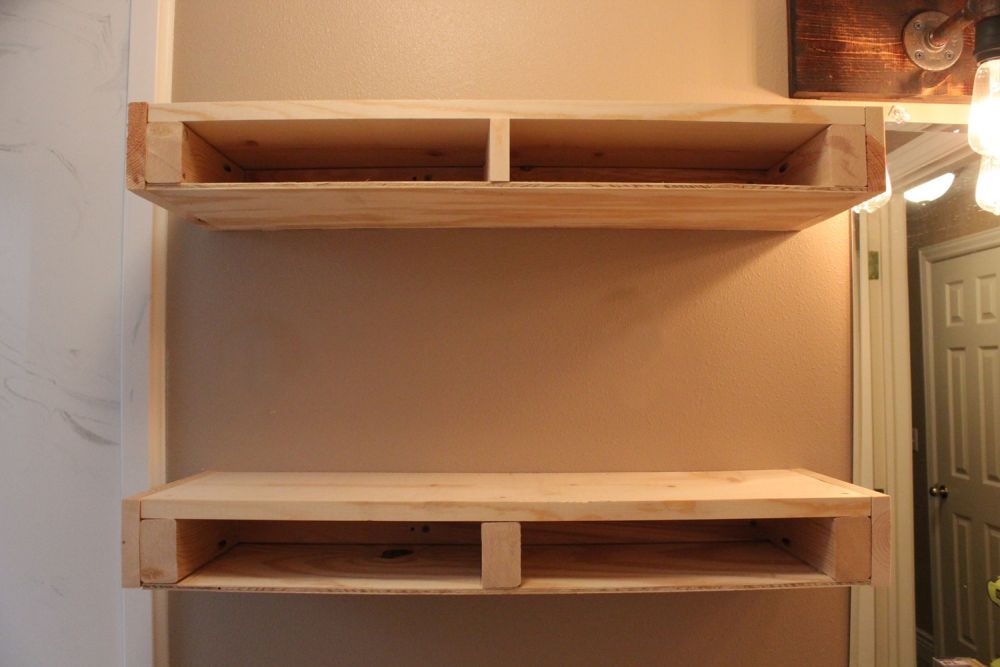
 Your floating shelves are taking shape. They should look something like this.
 View in gallery
 Step 12: Top plywood
Information technology'southward at present fourth dimension to attach the tiptop pieces to your floating shelves (your one×10 boards). Utilize wood glue and a brad nailer to attach these to your frames, forth the sides, back, and center of your top slice.
 View in gallery
 Your floating shelves are now set up for the finishing side pieces/trim.
 View in gallery
 Step xiii: Side pieces
Using the same process, attach all side pieces (your 1x4s) to the sides of your floating shelves. Endeavour to adhere the 1x4s to all parts of your existing shelves – the peak ane×10, the back 2×3, and the short 2×3. (But don't worry most trying to nail into the plywood.)
 View in gallery
 Step xiv: Fronts
With your top and side pieces on your floating shelves, all you lot have left to do is adhere the fronts. These are the 1x4s that are cutting i-1/2" longer than your other long pieces (in this instance, 29-i/2").
 View in gallery
 Neatly brad boom these front boards to your frames, again taking intendance to nail into as many of the floating shelves' components as aesthetically possible.
Viola! There you have it! Chunky, awesome floating shelves that you built without too much trouble, correct? Congratulations! At present it'due south upwards to you to sand and finish them any way you desire.
 View in gallery
 This instance uses Benjamin Moore's Strong White (after sanding with 120-grit sandpaper and Zinsser primer).
 View in gallery
 There are then many beautiful options for finishing your floating shelves, including staining them. It only depends on your infinite and your mood!
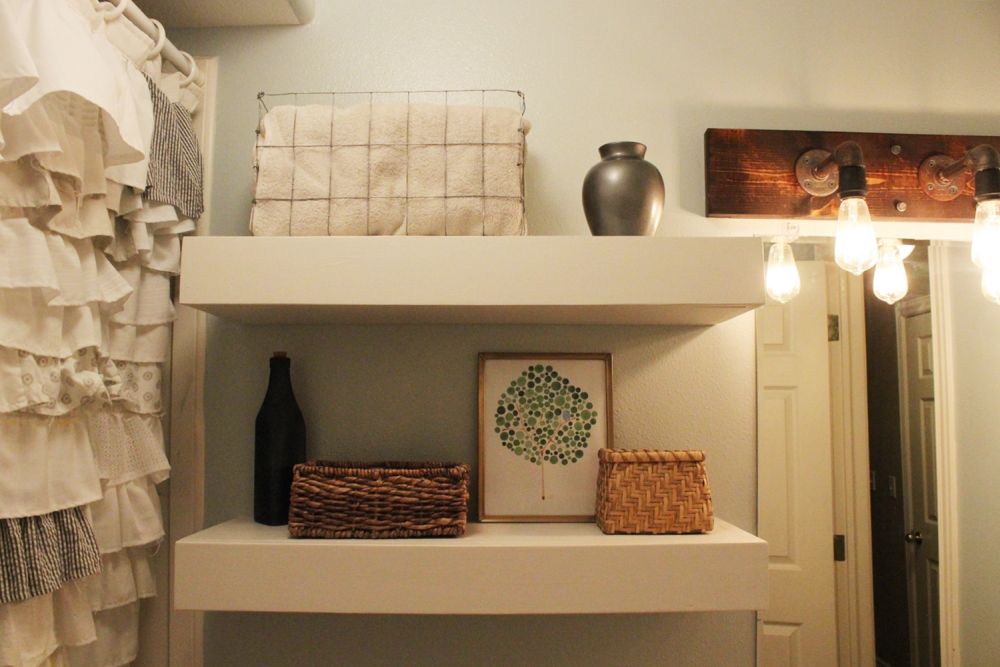
View in gallery It was the original program to stain these floating shelves, actually, but once the shelves were up in the tiny bathroom, adjacent to an already dark-wood-heavy industrial lighting fixture (learn how to make yours here), information technology became obvious that the better option for this space was lighter and brighter.
 View in gallery
 Toiletries are stored in the wicker baskets, which are like shooting fish in a barrel to reach and access just pretty to look at here. Spare towels are stored in the DIY industrial wire basket; everything else is kept to a minimum. The sparser décor on the shelves themselves matches the contemporary artful of these white, clean-lined floating shelves too.
 View in gallery
 Just for fun…recall where we started? These shelves make the whole (tiny) room, visually.
 View in gallery
 Nosotros hope you enjoy creating your own floating shelves! They will wait amazing.
schumanwhimen1991.blogspot.com
Source: https://www.homedit.com/diy-floating-shelves/
0 Response to "DIY Floating Shelves - How To Build Extra Bathroom Storage"
Post a Comment